The Need For Food Storage: How Much Food Do You Have on Hand?

photo credit: The Daily Telegraph

Is your family prepared for emergencies? My husband and I spoke with a network marketer who said that 95% of people just make a living. Whether they work as a store clerk or mechanic, or whether they’re a business owner, doctor, or lawyer, they have to keep trading their time into that profession in order for the income stream to continue. And for most of us, if we stopped working for a few weeks (because we lost our job, got sick or had to take care of a sick loved one, etc) it would create a big financial burden in a hurry.

And this not only applies to our finances but to our personal food supply. The majority of people only have enough food to sustain their families for a couple of weeks. For some people it may be more, but for others on a tight budget, it may be less. We’ve grown accustomed to living our lives day to day, knowing that we can go to the grocery store and get everything we need today, tomorrow, next week, and the week after that. And we give very little thought to food storage for emergency preparedness.
Think of all the things that could affect your personal food supply and/or your ability to get more food. Here are just a few things: tornado, flood, terrorist attack, civil unrest, massive power outages, inflation and even on a personal level, the loss of a job or income stream or a family emergency that prevents you from working.
Last summer we actually had a massive power outage that lasted for 3 days. I don’t know if you’ve ever been to Alabama in the summer time, but trust me, you don’t want to be without power for 3 hours, much less 3 days! Anyway–we managed to get some ice and transfer some of our refrigerated goods over to coolers, but unfortunately we had to throw some things out. And during that time we had to spend some our money on fast food.
That same week, many households were without power for 5 days. I remember reading in the paper about a lady who was in desperate straits because she’d just bought groceries before the power outage and now all her food was spoiled, and she simply couldn’t afford to take her family out to eat again. And because she only got paid every two weeks, she was in a quandary over how she could get groceries for the following week.
But what if the situation had been more dire? What if it had been a longterm problem?  For us, going 3 days without power seemed to drive us mad, not just because of the lack of internet, tv, and other luxeries, but because there was no way to cook our food or keep it cold. I can’t imagine what it would be like to be in that situation for a week, a month, or longer.  Can you?

We often read articles about emergency preparedness: having smoke detectors, a weather radio, a home evacuation plan, etc. But often food and water, the most vital things to our survival don’t get a lot of  mention.  I’ve been looking in to this topic, and as I prepared for the survival seed giveaway that I’m doing this week, I got inspired to create some other posts on this topic, starting with this one–sort of a mini series.

If you’re interested in learning more about this topic, I’ll be doing more posts on the subject in the next few weeks.  Also, later on today I’ll be launching the survival seed giveaway, which you are welcome to enter.
-Jerri

Work at Home Wednesday: Sock Sachets

This week I’m letting my resolutions and goals for the year begin, which includes coming up with a new schedule for my blogging and working to make this site a little more organized and structured.

On Wednesdays my plan is to do posts dealing with work at home topics. This could be anything from housekeeping tips and household projects to organizing or craft projects and even business ideas, tips, etc.for work-at-home-moms. And if I’m able to stay consistent with it and people like the future, I may turn it in to a linky event. What do you think?

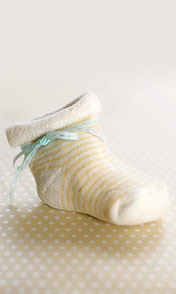
For today’s post we have a simple and frugal project, and if you’re a packrat like me, you’ll definitely appreciate this. If you have old socks or baby booties around your house, why not turn them into sachets?
Sachets are so great to place around your home and in drawers for a fresh and pleasant scent, and by using socks or booties, you can save money and even create a personal keepsake.
Just take a really cute baby booty or sock that your child has outgrown and fill it with a little potpourri. (Find this at Wal-mart or the Dollar Store.) You could also use other scented items, including spices from your pantry. Cinnamon or nutmeg would be nice, and I read about an example where they used oregano & basil…interesting!
Or you could use anything else around your house with a pleasant scent. We had some lavender scented bath crystals, so I used some of these to make a sachet. Also, if you’re allergic or don’t like scented potpouri, you can put baking soda inside your sachets. There’s no fragrance to irritate you, and it will help deodarize your drawers and home.
After you’ve filled your sock or booty, tie it up with a cute ribbon. It makes a great keepsake for your home, or you could use them as gifts. Grandmothers would love to get one of these, and you could always add a couple of these to baby shower gift basket.
If you don’t have any kids, or you’re not too concerned with making anything cute, this is also a great project to use with just plain old socks. (You know the ones that should have been thrown away months ago!) Just take some scissors and cut off the toes off the sock (basically halfway between the toes and the heel. Then fill the sock with desired fragrance, and use a ribbon to tie it up, or tie the sock in a simple knot.

Does anyone else know some of some frugal craft or household projects made with things found around the house? I’d love some new ideas!

-Jerri


————————
I am pleased to link up this post at the following:
Works for Me Wednesday at We Are THAT Family
Hooked on Fridays at
Hooked on Houses
DIY Monday at
A Soft Place to Land

It’s So Very Creative hosted by It’s So Very Cheri
Make it for Monday hosted by Cottage Instincts
Made it Mondays hosted by The Persimmon Perch
Making the World Cuter Monday hosted by Making the World Cuter
Make Your Monday hosted by Twice Remembered
Metamorphosis Monday hosted by Between Naps on the Porch

Sprucing Up The Yard

One of our current goals is to get the outside of our house fixed up. (This includes doing a little more work in the front yard and more importantly painting the shutters and fixing up the front porch.)

It’s a little on hold right now because hubby got laid off from his new job a few weeks ago, so we’re trying to save our money for “must haves,” but before that happened we did get a start on it.

In my next couple of posts I’ll be showing you some of the things we’ve been working on.

First priority was to break up this sidewalk that went down the middle of the yard. It was old and broken up in places, and it was kind of pointless because it ended about 2 feet from the road. (This must have been a trend because I neighbors have a sidewalk the ends about 2 feet from the road as well.) Anyway we got rid of the old sidewalk and have planted some grass seeds. The grass hasn’t come in fully yet, but I think it’s already looking better than it did with the old broken sidewalk! Plus, it’s going to be the yard look a lot

In the above picture you can also see where we pruned our trees. These are really coming back nicely as well!

We also had a bunch of old stepping stones going from the driveway to the porch. These were replaced with new ones. This looks so much better! (Sorry I don’t have a before picture, and please excuse all the dirt, as this photo was taken while we were building flower beds.)

Next post, I’ll be going through a step-by-step process to making a new flower bed.

-Jerri


Adventures in Shopping: The Little Bamboo

For this month’s edition of Adventures in Shopping, I’m sharing my new bamboo plant. I got it at the flea market for just $4. I just love the flea market! You never know what you’re going to find.

We used to go all the time when I was a kid to shop for antiques and collectibles. And I would look forward to getting a sno-cone or some other special treat…well, actually I still look forward to getting a sno-cone or some other treat. (Something about concession stands just lure me in!)

But I love the shopping too. It’s fun seeing all the great items they have to offer, old and new! I don’t usually buy much, but this time I managed to pick up a couple of “lucky cat” figurines, which I’ll have to share at another time. (I forgot to take photos of them.)

And of course, I got the bamboo. Most flea markets I’ve been too sell these. So if you like bamboo, you should visit the local flea market. I find that the bamboo at the flea markets usually looks a lot better than those sold in regular stores. And you can usually find a great selection of all sizes, varieties, and price ranges. (Plus, you can get the seller to make a special arrangement for you if you like.)

-Jerri


The Making of A New Flower Bed


In this post I’ll be sharing our newly built flower beds with you and going through a step-by-step process to making flower beds. I know it’s not exactly rocket science, but then again, there may be people who read this blog who, like me, have very little gardening experience and could use a tutorial. And to tell you the truth, I did learn a couple of new things from a landscaping expert, which I’ll share with you.

First hubby had to take a pick and chop on some roots from a little bush/tree that used to be in front of the porch. (Fun!) Below are all the roots.The first step in the flower bed making process was to till up the ground a little, and then we spread out the peat moss. (I believe we used about 10 big cubes of this.) Then we used a tape measure and placed the plants where they should go. Then hubby used the post hole diggers to make a hole. My job was pull the plant out of the pot, place it in the hole, and pack the dirt in around it, while he went to the next place to make another hole.

Then we placed professional grade landscaping paper over the beds. (The landscaper who broke up our sidewalk recommended the professional grade over the regular kind. He said we’d still have weeds if we used the regular kind, and he informed us that newspaper is not good to use with azaleas. Funny, my parents always used newspaper…who knew it was “bad,”? But since he’s the expert, I’ll believe it.)


After spreading landscaping paper over the length of the bed, cut it from the roll. Then go to plant, and make a cut with your scissors. The cut should be made so that it’s along the center of the plant, and it should be long enough that it goes slightly past the back of the plant.

Tuck the paper in around the plant. Get it as close to the plant as possible. Then pull the two ends of the paper (from the cut you made) together, and use landscaping staples to hold the paper tightly together. (We used 3 large packs of these.)

The use the mulch of your choice to spread over the top of your bed. For azaleas it is recommended that you use a hard wood mulch rather than a soft wood mulch. Usually I prefer brown mulch, but we chose black instead. (We used about a dozen bags of this.)


Finally place a border/barrier around the flower bed. This can be as simple as a strip of plastic edging or something a little more fancy like concrete landscaping blocks. (Unfortunately I don’t have a photo of our completely finished products, as we put out the edging on a different day from when these pictures were taken. I’ll try to get a photo and add it to the post soon though!

Oh, and last but not least, get a broom and sweep all the stray dirt and mulch off the sidewalk!

-Jerri


————————————
I’m submitting this post to the following carnivals:
Make Something Monday is hosted by
Jolly Mom and Go Graham Go.
Show and Tell Friday is hosted by
There is no place like home
Hooked on Fridays is hosted by
Hooked on Houses
Project Friday is hosted by
Sugarplum Cottage

A Foreign Invasion of My Washing Machine

Today I’m sharing an article that was sent in by Michael Brown. It’s a story that a lot of you moms out there will surely relate to, and it’s a very relevant article to read during tough economic times.
———————————–
Washing machines are for washing clothes, not your children’s toys. Adults know this but sometimes kids have to find out for themselves. I have five year old twins and I’d like to think that I’m a pretty good parent, but my little angels occasionally get themselves into things that they’re not supposed to, like my washing machine. Here’s my story about appliance repair.

My boys like to play army when they’re stuck in the house on a rainy day. They take these little green men and hide them all over my house and then hunt them down with some jeeps and plastic tanks. It can be an annoyance when I’m cleaning up and finding army men everywhere but its fun to watch them strategize and have fun. They have been warned though about hiding their toys in appliances or under appliance parts of any kind. I guess they didn’t think that this meant the washing machine.

If you’re a parent, you can probably guess the rest of the story. The jeep and the tank somehow ended up in the washer and the washer got turned on mysteriously. Both boys came pelting up the stairs and Mom had to go down and shut her very loudly banging machine off before the damage got too extensive. The appliance itself was okay because the toys weren’t in there that long but the agitator had gouges in it. That plastic they make those trucks out of is tougher than it looks.

I did have a brief moment at this point where I feared that I would have to buy a brand new washer, but common sense took over. I could see that it was just the agitator that was damaged and it looked fairly simple to replace. As a single mom, you have to learn how to be handy with tools and raising two boys you need to be able to fix things that are broken without calling in professional help.

Taking a neighbor’s advice, instead of calling for an appliance repair guy I went online to http://www.appliancepartspros.com/ and ordered a new agitator for $29.07. They have Whirlpool parts for washers, dryers, refrigerators, ovens, stoves, and appliance parts for just about everything that you can’t find in a hardware store. All in all, there are over 1,000,000 appliance parts at Appliance Parts Pros and you can order them shipped the same day. It was a great option for someone like me who has more time than money. The installation was fairly easy and the washer works great now. The kids are still grounded.

A Brief Look At Our New Home

Above is a picture of our new house. Disregard the 2002 date stamp. The photo was taken a few weeks ago by my stepdad…I guess he wasn’t paying attention. I’ve always liked houses built in this style, with the porch going across the front. It’s very cute and simple, and sort of country looking, which I like. We still have to paint the porch and the shutters, and we’re probably going to break up the “walk way” that comes out from the middle of the porch and just let the grass go over it. And we’re going to build new flowerbeds, but we probably won’t do that till next spring.

All in all, it’s a very nice house, especially for a “starter” home. And of course it has its pluses and minuses.

Pluses: Big back yard, Huge outbuilding, Brand new laundry room (just added on to the house), Big kitchen/dining area, 3 bed rooms, 1 1/2 baths, Has a living room + the previous owner closed in the garage to make a den area (this room will be our office), Large deck area. Plus we’ll have new appliances, fans, carpet, and paint.

Minuses: The bedrooms & bathrooms are small. Lack of closet space (I sense a post coming on this). The outbuilding needs some work. No garage/carport. (but we have room to build one off to the right of the house, or we could use part the outbuilding to park cars.) Also, not sure how energy efficient the house will be.

My Favorite Feature: The Kitchen Area or the den/office room.
My Husband’s Favorite Feature: The Den/office. His second favorite feature is the outbuilding aka his “Man Cave” or “The He-Man Woman Hater’s Club.” (he’s a Little Rascals fan)

I’ve been imagining where all the furniture will go and how all our stuff will be arranged in cabinets…but imagining just isn’t quite the same as actually doing. I can’t wait to move in!

Lighting for Your Backyard Parties


I’ve been looking up different party ideas when I found these really cool solar lanterns. These look very nice, and unlike a lot of alternatives, you don’t have to deal with bunch of ugly wires, and you don’t have to go through a huge installation process. You simply hang these outside in the sun so that they can charge, and when the sun goes down these handy little lanterns will give off a nice glow.

But if you live in a shaded area, or you’re just looking for something of a different style,there are a lot of great choices when it comes to lighting for your outdoor party. Some popular choices include Candles, Flaming Torches, Strings of Christmas lights or novelty lights, Electric wall laterns & post lanterns, strings of paper lanterns, etc.

Here are a couple of cute choices, followed by some links:

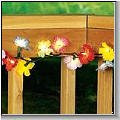
Flower Lights

Flipflop Lights

Sunsetter Patio Lights

Colored Lights

Cherry Blossom Lanterns

If your in the market for some party lights, here a few links you may be interested in:

Ivillage – for more info on solar lights

Offthedeepend.com – They have a fun variety of light strings

Nextag – cool lights here

Japanese Lantern lights

If you get creative with the lighting and decor, you can create a fun & unique atmosphere for your summer barbecue or pool party. And if you shop around, you can usually find some good deals on this stuff too! Have a good day!

Spring Cleaning: The Living Room & Den, Part 2

Just a few more cleaning tips to spruce up you living room area and den:

-Dusting: Remove items from your entertainment center, coffee table, etc. and dust your furniture to give it a clean shine and eliminate allergens. Also, take a moment to dust picture frames and knick knacks, and dust/clean lamps, ceiling fans, and lighting fixtures.

-Eliminate Clutter by Creating a Space – De-clutter your living room by creating a space for room-cluttering items. Purchase a media cabinet for movies, video games, etc. Purchase a toy box for quick storage of kid’s toys in the living room. Or purcahse a hall tree to hang coats, umbrellas, etc.

-De-clutter by getting rid of unwanted knick knacks and decor.

-Controllers and game clutter- Come up with a place to store video game controllers and tv remotes so that they are out of the way. Perhaps place them in a special bin or basket that looks nice or hide them away in a media cabinet.

Creating a work & hobby space – If your living room is used as a game room, hobby room, or work space, or home office/family computer area, create a designated space that is just for this purpose (perhaps in the corner), and make an effort to de-clutter and organize it.

-Windows – Take down curtains and blinds to be cleaned. Use a vacuum to clean the base of the window. Wash windows inside and out.

-Spruce up walls – Dust walls with a swiffer, wipe down base boards, and touch up scuff marks. And get rid of cobwebs in the corners.

-Rearrange: Change the look of your living room by rearranging picture frames, decor, or furniture.

-Mats & Rugs – Clean or replace rugs and mats in your living room area, especially those in high traffic areas and doorways.

Related Articles:
Creating a Shoe Station

Spring Cleaning: The Living Room & Den, Part 1

When I think of spring cleaning, the living room/den area isn’t the first place that comes to my mind. I think this is because we typically don’t store things that get cluttered and need organizing in this room. And speaking for myself, I do a little bit of cleaning every day in the living room, sort of a “clean as you go” plan. Also, I think sometimes everyday-clutter has a tendency to just be natural to us. (like kid’s toys)
But I think that since we spend so much time in this room, (particularly our leisure time), we should make a special effort to keep it as clean as possible (while still maintaining a comfortable & relaxing atmosphere). So I got to thinking about some different ways to approach spring cleaning in the living area.

-Cleaning Carpets & Upholstery: Run the vacuum over your carpets and furniture upholstery. Use the hose and an attachment to get in between and behind cushions. If the cushions can be removed, take them off the couch and vacuum the bottom side of the cushions as well as the entire area underneath the cushions. If applicable, consider flipping the cushions over before placing them back on the couch. Take cushions outside for a while to let them air out, or sprinkle baking soda or fabric refresher on cushions before vacuuming to eliminate odors. To eliminate odors on carpets, sprinkle baking soda and leave it overnight. Then vacuum the next day.

-Afghans & throw pillows – If cleaning instructions allow, place these in the washing machine. Or take them to be professionally cleaned. Place throws and pillows that you do not plan to use again till next winter in a vacuum storage bag or other water-proof, moisture-proof container and store them in a closet, under a bed, or in the attic. -Buy or Rent a carpet cleaning machine: Once or twice a year my dad shampoos his carpets with a professional carpet cleaning machine. If you can’t afford one of these, you can rent one to use. They work extremely well, and you won’t believe how much dirt they keep up. And your carpets will look great. You also hire someone to professionally clean your carpets, but it’s much more cost efficient to do it yourself.

Related Articles:
Indoor Air Quality Articles
Eliminating Odors