How to Purchase an Online Plant for Delivery

Sadly, there’s no access to a nursery or horticulture facility for most of us living in a small town. There are gardening centers, but these offer minimal selections compared to the countless varieties of houseplants available for the regions in which we all live.

In some cases, the center will order the choice you want, but that’s a rare occasion, plus the delay in getting the plant can be extensive until the

representative searches for the foliage and has it shipped to the store. Then there’s the issue of expense.

Another option afforded people with few other options is a plant store online offering delivery to your front door. There are numerous nurseries offering shipping for their foliage options by air, freight, or standard mail deliveries throughout the country. These provide more choices than you could possibly imagine, with the only recommendation that you purchase those that will thrive in your specific environment.

How To Purchase An Online Plant For Delivery

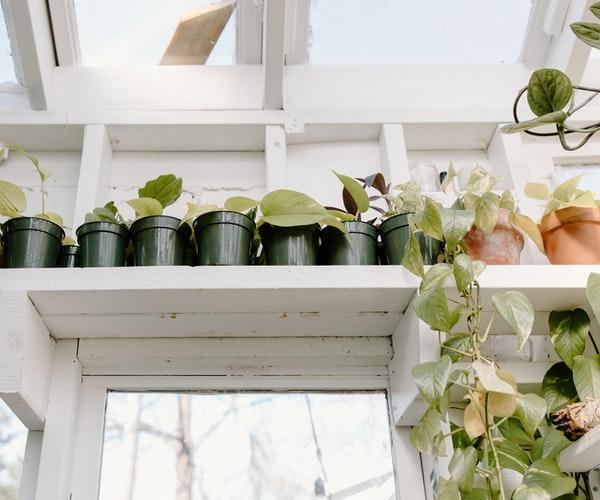
Whether you are in a small town with little access to a nursery or horticulture center or a minimal selection in the garden center where you typically shop, it can be frustrating attempting to buy the plants you want to include in your indoor garden.

More people participate in gardening since the hobby reduces stress levels and brings a sense of calm to overworked minds. Not getting the products you want could present a problem, except there is now the option to purchase almost any greenery you desire online.

Some gardeners are a little hesitant to follow this route, not understanding how the process works or where even to start. The fact is it’s relatively straightforward in that you can search the specific foliage you have an interest in obtaining or do a search for nurseries online. Find out how to select the best online gardening company at https://www.thewowdecor.com/5-tips-for-choosing-the-right-plant-delivery-company/#.

The process for ordering is comparable to how you would shop for anything else on an online platform. Some things that you need to take into consideration to be sure the plants are of good quality include:

● The reputation of the seller

Generally, you’ll find one of the best references for a seller is word-of-mouth from those who have previously purchased from them. You can gain insight into whether the business is well-established if there is a solid following, and what practices they implement into their plant growth and maintenance.

The way to gain knowledge is by putting the questions onto a gardening forum or social site. Practicing gardeners can advise where they purchase online, or you can see if anyone buys from the site you have an interest in, plus check out authoritative reviews for that particular website like with the Better Business Bureau or with Consumer Affairs.

● The company will stand behind their products

A robust online nursery will back the products that they offer their consumer to ensure overall satisfaction. Look at how they handle their refunds and if there are guarantees for the varied options before you commit to buying. Check out the “About” page to learn about the company, how and why they chose the gardening game.

You can tell by their introduction if there is a pride in what they do, if their products bring them joy, and if they believe in what they send to their customers.

● Secure and safe website

Security and safety are more about the way they handle personal information from the client. When buying from the internet, you always want to ensure that the website is a safe site and that the varied payment options are secure.

Customers should always get a receipt from their purchases without question, and private banking information needs to be kept confidential with no personal information sold to other sites.

● Time For Shipping

No one wants their foliage to spend a great deal of time traveling in a box. The least amount of time is the best. It’s better to order as early in the week as possible to avoid the greenery having to sit for some time over the weekend.

You can also choose express or expedited shipping processes, but these will be much more costly- that is sometimes worth the expense in order to get a healthy, hopefully, non-damaged product.

● Extreme temperatures

When ordering plants online, it’s wise to pay attention to the time of year and the weather conditions. Both sweltering temperatures and frigid temperatures can prove detrimental to a traveling plant with more of a chance for it not to survive the delivery process.

Just as you would when planting for an outside garden, you should wait until late spring when the weather is just becoming warm or as it’s starting to cool down in the latest part of the summertime.

That will also depend on your location since some areas are more tropical with only warm weather, and others offer extensive cold seasons. That’s why you research the plants that are better for your specific region.

Final Thought

Buying plants online is becoming super popular, especially for gardeners who have fewer other options, like those who live in small towns or cities where nurseries and horticulture centers are harder to come by. View here tips for purchasing foliage through mail order.

Even if you do have these or gardening centers, the selections are quite limited, whereas there are countless options when shopping online. You just need to do a bit more homework to find a reputable provider and high-quality products – plus greenery fit for your region.

A Guide to Creating a Bespoke Study Space for your Kids

Children tend to prefer going out to play or staying glued to gadgets than sitting down to read. Some even have short concentration spans, making it challenging to finish their homework. You can encourage them to complete their school assignments by creating a fun and comfortable study space that will make them hate their tasks a little bit less. The following article will provide you with tips on creating a bespoke study space for your kids.

Ensure adequate lighting Set their work desk next to a window where they can get ample natural light and avoid squinting. Ensure that the outside view does not shift your child’s focus from studies. Ensure that the overhead lighting is sufficient and place a table lamp to supplement the general lighting in the room. If your child needs an internet connection, ensure that the connection is strong without any disruptions.

Follow ergonomic rules

Your child’s work table should be at waist length and allow them to rest their elbows without hunching over. Ensure their feet can rest flat on the floor and place their computer screen thirty inches away from their face. Place a rolled blanket on their lower back to ease pressure and reduce soreness.

Avoid distractions

Please switch off the television during study time to prevent them from being distracted. Keep their noisy gadgets and toys away from their sight until they have completed their work. If your child works best in a noisy area, carve out a workspace for them in the living or dining area where you can control the noise to a manageable level.

Keep their space clutter-free

Ensure that your child’s workspace is neatly organized to enhance motivation and prevent them from being distracted by clutter. Invest in a kids desk with storage to stash their books and supplies. Help your child be organized and keep up with deadlines and reminders by creating a bulletin board or using sticky notes. If your teen uses a laptop or computer, ensure you arrange the tabletop to create space for paperwork.

Personalize their study space

Decorate your child’s work table with art they made themselves and add bright and colorful accents. Adding a personal touch to their workstation will give them a sense of ownership and brighten their mood. Assign them the responsibility of returning their books and supplies once they finish reading.

Provide the necessary supplies

Keep supplies such as pens, markers, paper, crayons and chalk in the same room and in a place where they are easily accessible. Schools nowadays encourage students to participate in DIY projects in posters, charts, and presentations to boost their creativity and make the learning process more enjoyable.

Set the right ambiance

You could opt for a makeshift black or whiteboard to facilitate tutoring sessions. Choose a seating arrangement that provides utility and comfort, but not too much comfort that they end up falling asleep. Create an ambiance that will let them know that it is time for serious business when they are in their study space.

Wrapping up

We hope that this article has been resourceful and that you will use these recommendations to help your child in their learning process. Spruce up their space to encourage them to study right from an early age.

Best Herbs For Hydroponic Home-Gardeners

As hydroponics becomes a gardening trend, most homeowners want to try their hand at it. Hydroponic gardening lets you experience the joy of growing plants even if you do not have a conventional growing space. Not to mention, these systems are resource-saving and eco-friendly as you can grow without soil. Herbs make an ideal candidate to grow hydroponically because they are small and fast-growing. Experts believe that they have a more potent smell as compared to their soil-grown counterparts. But some herbs do better with this growing system than others. Here is a list of the best ones for hydroponic home-gardeners.

Basil

Chefs acclaim basil for its freshest flavor and healthy essential oils that make it perfect for everyday cooking. It is also one of the easiest options to grow hydroponically. You can easily create ideal conditions such as a sheltered place and plenty of warmth and light indoors. It can be propagated by stem cuttings. The recommended nutrient solution pH for the herb is 5.5. Make sure you keep harvesting the plant and do not let it flower.

Parsley

Another herb that thrives in a water-based growing system is parsley. You cannot imagine cooking without its fresh flavor, so make sure you have it in your gardening checklist. Like basil, it requires a nutrient solution with pH 5.5 for healthy growth. The best part is that it is a low-maintenance herb, and the warm temperature and plenty of light are enough to keep it thriving. Parsley can even survive freezing temperatures, making it a sturdy one to grow.

Cannabis

Surprisingly, hydroponics make an excellent option for cannabis home growers as the system lets them grow indoors. It also offers a hygienic environment for organic plants. Not to mention cannabis plants grow a lot faster when you cultivate them hydroponically. All you need is a proper kit to get started, such as wonder buds seeds, a humidifier, lighting systems, ect. It is a good idea to invest in Centurion trimmers as you will need them down the line. The machine works for trimming both wet and dry material. So you can prepare your stash at home and even sell it, provided you are in a legal state.

Mint

Mint is a strong herb that grows fast and is almost disease-free. It is as good with hydroponics as with conventional gardening. Growing mint indoors is all about ensuring it gets adequate light because it requires 12 and 16 hours daily. The pH range should be between 5.5 and 6.5. Fresh air and high humidity during the rooting phase are some other factors you need to ensure.

Chamomile

If you are a herbal tea lover, growing chamomile at home is a good idea. The herb does well with hydroponic gardening, and you can go ahead without second thoughts. While this plant loves the sun, it can do well even with only 4 hours of light every day. If you use grow lights indoors, you need not worry about long bills. Warmer climates are ideal for this aromatic herb.

Experimenting with hydroponic gardening requires the choice of the right plants. Follow this list, and you can have a thriving garden at home.

Can a roof vent be installed outside the house?

Installing a roof vent is often done to help alleviate problems with moisture buildup inside the house. A roof vent should never be installed outside the house, as this will cause major problems with moisture, snow accumulation, and ice dams. This blog post will teach you the common mistakes people make when installing a roof vent so you can avoid making them yourself.

What is a roof vent?

A roof vent is an outer cover that is installed on the top of your roof. It’s designed to relieve an attic space of excess heat and moisture. Installing a roof vent is often done to help alleviate problems with moisture buildup inside the house. The vent should never be installed outside the house, as this will cause major problems with moisture, snow accumulation, and ice dams.

Can a roof vent be installed outside the house?

Installing a roof vent outside your house can cause major problems. For example, snow and ice will accumulate on the vent, and it will likely become clogged with snow and ice. This can cause ice dams and eventually leaks.

It’s also important to note that a roof vent isn’t intended to let cold air in your house during the winter. Installing a roof vent outside your house will cause your furnace to work harder to keep the home warm.

A roof vent should be installed at the peak of your roof, not outside the house. If you’re experiencing moisture buildup inside your home, installing a roof vent is a good option for you. But it should never be installed outside the house.

Choosing the right location for the vent

The first step of installing a roof vent is choosing the right location for the vent. If you choose the wrong place, you may find yourself having to remove the vent entirely.

One common mistake people make when installing a roof vent is installing the vent too close to the roof’s edge. This is a bad idea, as snow accumulation can clog the vent, leaving it unable to work correctly. Even worse, snow could fall into your house due to this mistake.

A second common mistake is putting vents on the same side of the home. This will cause ice dams to form on one side of your house. Ice dams are essentially large chunks of ice that form on your roof and effectively prevent water from flowing away from your home.

To prevent any of these mistakes from happening, it’s important to take measurements of your roof before installation. As well as consider what type of shingles are on your roof. This will help you determine the best location for your roof vent.

Using window opener and window closer

Aside from installing a roof vent, it’s also essential for you to have a window opener and a window closer so you can easily access natural and fresh air to add to better air circulation. With window openers and window closers, you can conveniently control your windows and let the air in without relying too much on roof vents.

Final Thoughts

Installing a roof vent is an easy DIY project for homeowners. However, not all homeowners know how to install a vent correctly. The wrong installation could lead to major problems in the future, like moisture buildup and ice dams. Hopefully, after reading this blog post, you feel confident in your ability to install your very own roof vent.

What Is The Best Way To Clear A Bathtub Drain?

Hair and dirt can clog the bathtub drain. Often, they reach deep into the drain and get stuck, creating a foul odour as well. Usually, long hair wraps around the cross on the bottom of the drain body. But you need to install a strainer to catch shorter hair.

If you have a hair catcher assembly and yet cannot clear the drain all by yourself, you may have to call a plumber. In that case, try contacting several companies as you might not find someone available on the spot. Not every professional offers emergency unblocking to clear drains London on a Saturday night.

The Best Way to Clear a Bathtub Drain

You can use special tools to remove the blockage of hair that is clogging the drain. In detail, there is a metallic stick with a little brush on the end that works wonders. Just stick it down the drain to grab the hair and pull it out.

Stores sell different versions of hair clog remover tools. But you can also use a wire laundry hanger and cut it with pliers. After you bend the tip in the shape of an L, your homemade tool is ready to go down the drain and remove the blockage.

When removing hair from a blocked drain, keep a mask on to avoid smelling what is below. As any BDS drainage expert will tell you, even professional plumbers with over ten years of experience can start dry-heaving when exposed to such smells.

Other Methods to Unclog Your Bathtub Drain

The Plumbing Snake

Plumbers use a drain snake to unclog the bathtub drain. That is, a tool that you can feed deep into the piping system. Here are the instructions:

1. Turn the tap on and put a little bit of water in the bathtub to test for drainage.

2. Wear gloves and use the hair clog remover tool to clear the space underneath the drain.

3. Use a Phillips screwdriver and take the top part of the bathtub off to access the overflow.

4. Insert the drain snake inside the overflow and keep pushing and twisting it with the dial

5. Once you get in, you may have to loosen up the locking system before feeding the snake inside. Some models come with a safety lock.

6. Keep feeding the drain snake into the pipe until you feel it stop because of the blockage.

7. Lock the cable in place

8. Rotate the dial and push the snake for a minute or until you feel the blockage coming off.

9. Pull the snake back. Use a paper towel to avoid muck splatters as you remove the cable tip from the overflow.

10. Use a box cutter to cut twisted hair around the tip of the drain snake.

Chemical Drain Openers

Drain cleaners use acid to unblock or corrode the blockage. Given that these products are readily available in most stores, people tend to use them. But while they might work, they are known to cause long-term damage to your pipes. So, use them sparingly and strictly follow the instructions.

5 Surfaces That Are Suitable For Epoxy Coatings

The versatility of epoxy and its chemical qualities that allow it to attach (stick) to a variety of surfaces continue to amaze us. If you’re looking for a long-lasting, hard-wearing finish like epoxy coatings, you’ll be pleased with the results of JDL surface coatings epoxy.

In spite of the fact that epoxy coatings are quite adaptable, the adhesive qualities of epoxy coatings do have a few restrictions on which surfaces may be used without fear of delamination.

Many businesses rely on epoxy, notably in the flooring and resurfacing sectors, and it is expected to stay so. Surface bonding material or commercial coatings, such as epoxy, can be used to resurface existing surfaces by placing them directly on top of the existing substrate. Using epoxy coatings for resurfacing has been demonstrated to be a reliable material due to its excellent performance as well as its long-term durability. In the foreseeable future, epoxy coatings will continue to evolve.

In this post, we’ll go through the many sorts of hard surfaces that our epoxy experts suggest for epoxy coatings, as well as the ones they don’t. As long as you know which surfaces are suitable with epoxy, you can avoid a lot of waste and reduce any worries about the application not adhering properly.

The epoxy may adhere to a variety of surfaces, but not all of them are suitable for everyone.

When it comes to spaces where there is minimal space for error without squandering time and materials, enthusiasm alone can only go you so far. Resurfacing jobs might be a challenge for some people who aren’t skilled enough to do the more demanding chores that need professional knowledge and expertise. All hard surfaces may be adhered to epoxy coatings, each with its own benefits and limitations, without a doubt.

However, not all of the following hard surfaces are suitable for all epoxy coating applications:

Recommendation #1: Concrete

When applying epoxy coatings, bare concrete surfaces are the most common and preferred option. Before applying epoxy, the concrete must be completely cured (and prepped). Make sure there are no old coatings or previous surface applications left.

Concrete preparation gear, such as concrete floor grinders, should be used for concrete flooring assuring proper surface preparation. To grind and profile concrete surfaces, concrete floor grinders use a mix of power and aggressive concrete equipment to achieve the desired results.

Recommendation #2: Granite or Marble

Whether it’s in your home or business, a marble or granite surface adds a sophisticated and luxurious feel to your surroundings. Epoxy coatings may be applied to these surfaces since they are formed of a combination of rock components, crystals, and other minerals.

Because of their high-class appeal, these beautiful surfaces are usually not covered up. Surface scratches and weathering are unavoidable, even with their imperviousness to the elements. In the long run, this will dull the sheen on your surfaces, making them less desirable. Thus, the epoxy coating can extend the overall life expectancy of the floorings.

Recommendation #3: Tile

Tile surfaces have been around for a long time, compared to many of today’s more modern flooring alternatives. It has also emerged as a new need for attractive, long-lasting, and seamless epoxy coatings as a result of the modernization of flooring materials.

Epoxy coatings can be applied to tile surfaces, although this isn’t always a good idea. The majority of tile surfaces may be coated with epoxy; however, we do not always advocate it for everyone due to the task’s difficulty. This is especially for those new to the profession who may be inexperienced.

More than that, the resurface coating itself is required in huge amounts. The contractor should have extensive experience in the field to handle the project efficiently.

Crack and grout fillers, as well as cementitious overlays, are known as micro-toppings, are among the additional supplies you’ll need. This application requires the use of fillers and engineered cement components.

In order for epoxy coatings to adhere correctly, the surface must be flat, consistent, and homogeneous. Crack and grout filler materials must be used to fill up all the gaps between each tile BEFORE the application achieves this uniformity level. When epoxy coatings are put to the surface of the existing tile, a thicker substance known as engineered cement can be used as an alternative.

Recommendation #4: Ceramic

This combination of hard, brittle, and sturdiness makes ceramic an ideal material for creating a hard surface alternative. Inorganic, non-metallic, frequently crystallized oxide, nitride, or carbide minerals are also commonly used to make ceramics.

Resurfacing materials with severe characteristics, such as those found in ceramic, can endure chemical erosion. It is also known as “porcelain” because of its ability to endure extremely high temperatures.

Epoxy coatings can be applied to ceramic surfaces after they have been cleaned using a chemical solution designed for this purpose. Using a sandpaper or angle grinder, softly sand your ceramic surfaces until they have a contoured surface that epoxy can chemically connect with, then wipe them down with a damp cloth. After that, apply the epoxy coating and wait for it to dry.

Recommendation #5: Wood

In theory, epoxy can adhere to wood, however some varieties of wood can cause the epoxy to fail to adhere effectively. It’s possible to get better results by using a specialized product like wood primer on the surface, but there are no guarantees.

When it comes to epoxy coatings, wood surfaces may be a real wildcard for individuals who are new to the field or just untrained. There must be no loose panels, gaps, or evidence of buckling on the wood surfaces in order for the epoxy to bond correctly. For the application to operate, the whole sub-surface beneath wood surfaces must be solid, non-expandable surfaces.

Summing Up!

Epoxy coating performance depends on the cleanliness and preparation of the surface and the surrounding circumstances during preparation, application, and curing.

Temporary climate control solutions are used when a regulated environment such as a factory is not accessible for the epoxy surface painting procedure. We hope that this guide has helped you make the final decision whether you should opt for epoxy coatings or not.

What Can You Do To Keep Your House Clean In Less Than An Hour/Day?

That’s an excellent question!

Or, to put it another way, “How often do you need to clean your house in order to keep it clean and tidy?”

Sometimes people just have this mental image in their heads that cleaning will take hours, if not all day. But, honestly, does it have to take so long?

It’s true that not everyone enjoys cleaning or maintaining their home for hours, if not all day. Not everyone is spotless and orderly. But one thing that all of them have in common is a need for a clean and orderly environment. Some individuals are naturally good at it, and they can’t bear messes; perhaps this is related to the way they were raised and trained as children. They just begin cleaning up items that are lying around or wiping and dusting objects they come across on an unconscious level. If you go professional make sure to get cleaners insurance

But some of us aren’t built that way. Some of us are too weary from our workdays to begin cleaning when we come home. Not to mention parents with small children who appear hell-bent on creating as much chaos as possible at all times. It’s simply not in our nature for some of us. It’s difficult to pinpoint why, but some of us just don’t have the “clean and tidy” gene.

How can we maintain our house clean and neat without spending a lot of time doing so?

Don’t fret! In this post, we share some of our tricks for keeping your house clean and neat in under an hour.

Here’s the secret: Don’t do all of my tasks at once! Break them down into small chunks and work on a few small jobs every day.

Bathrooms

So, let’s begin with the sections that will take longer to complete, such as the restrooms and toilet. Cleaning a bathroom takes between 20 and 30 minutes on average, depending on how unclean it is and how many bathrooms and toilets you have in your home. If you have multiple bathrooms in your house, you may clean one bathroom and one toilet on Monday and the other on Tuesday. It’s just an example; you may choose any weekday.

Floors

Vacuuming and mopping are next on the agenda. Most people don’t vacuum or mop every day. To keep your floor clean, it can be sufficient to quickly sweep up any small crumbs each day. It’s generally a good idea to dust (windowsills and furniture) right before you begin vacuuming. Don’t do these tasks on the same day you clean your bathroom and toilet, except on days when you have the time or just because you’re in the mood to complete them all at once.

Kitchen

What about the cooking area? Kitchens are commonly thought to be difficult to clean.

Cleaning some areas of the kitchen, particularly the rangehood, may be difficult. It does not, however, require cleaning every day or even once a week. You may simply clean it well once or twice a month. Every other day, you may just wipe the exterior of it and wipe the stovetop and bench after you’ve finished cooking, as well as the dining table after you’ve finished eating, to keep them looking clean.

The dreaded dirty dishes, especially when they pile up in the sink, may make our kitchen appear unclean at times. To avoid this, make a point of immediately washing any cooking utensils, plates, bowls, or cups that you or your children have used. Because none of the food clings to the objects you’re washing, it takes around 2-5 minutes if you do it soon after. If you really don’t want to bother, you could always put them in the dishwasher (if you have one) and leave it running while you sleep. You’ll wake up to clean dishes in the morning. But don’t forget to unload the dishwasher!

The Minor Aspects

Let’s now look at some minor things you may do to keep our space appearing neat. Let me begin with children’s toys. Yes, most children regularly remove every item from the toybox and leave them strewn around the floor. Some of you, my fellow parents, have undoubtedly stepped on a Lego piece by accident. Ouch! Yes, it’s a dreadful experience. In fact, it’s very painful!

To avoid a mess, politely ask your kids to put their toys back in the toybox after they’re through playing with them, or just put away the ones they don’t want to play with anymore. Encourage them to accomplish it by rewarding them once they’ve completed their task. I wouldn’t advocate going crazy with the goodies, but rewarding great behaviour in a balanced approach has its benefits.

Then there’s the matter of making the bed (s). Making the bed is one of the simplest yet most important jobs. It takes no more than 5 minutes and may be done as soon as you get up in the morning, with the exception of changing the sheets, which should be done once a week.

Laundry

How about the laundry? The average person does their laundry once a week. If you are a single person or a couple without children, that frequency is fairly realistic. Doing laundry once a week isn’t ideal for a single mother with two children. Don’t let your dirty clothes pile up, so it then takes you a full day to clean up. That’s precisely what you’re trying to prevent. Instead, do laundry every two or three days and put it away once it’s dry.

Something I’ve learned that is really important in keeping my home clean and tidy is to keep all major surfaces free, such as the kitchen benches, tables, floors, or any other large surface. To keep your house looking its best, always be sure to put items back where they belong after using them.

See? Keeping your house clean and neat does not take long. Because who has hours or all day? You simply need to set aside 30-40 minutes every day. 

Why Choose Drain Unblocking Services in North London?

The water is draining away slowly. You are starting to smell a bad odour coming from the drains. Often, these are signs that you have a blockage somewhere in your drainage system and you need to do something about it quickly. Otherwise, it can get worse and cost you a fortune.

The best way to resolve a problem with your system is to hire a drain unblocking service. There are many available in North London and this is going to be the best solution. But, a lot of homeowners are apprehensive to use a professional service down to cost. Here are some reasons why it is always best to choose a drain unblocking service.

Enjoy a Quick Solution

Nobody wants to have a blocked drain in their home. The side effects of this problem can be severe. We are talking about having water drain away slowly, as well as having a complete blockage. There can also be a bad odour around the home, plus gurgling sounds and strange noises. Having a blocked drain is very inconvenient and the sooner it is dealt with, the better it will be for everyone.

The good thing about using a professional drain unblocking service is that they are going to know how to solve the problem quickly. With their training and experience, the experts will know what the best approach is and be able to get on with the job. In addition, some companies that offer services in North London, such as FS Drainage, are available in emergencies to make sure you get the help you need as soon as possible. With quick response times, you can have an expert at your home in no time. Attempting to solve a blockage yourself can take a lot of time and this is especially true if you do not know what you are doing.

Find Out the Cause

If you have never had a blocked drain before, you might be curious at what has caused this to happen. You may feel like you have done nothing wrong and are puzzled about why this has occurred. After all, you do not want it to happen again and when you know the cause, you can stop it from developing in the first place.

Well, experts are going to be able to locate what the problem is and tell you more about it. For instance, one of the common reasons why drains become blocked is because homeowners are not careful. Namely, they are not cautious with what they are washing away down the sink. Food can be dropped down the drain, as well as other items that should not be going down there at all. Over time, they can build up and cause a nasty blockage that has a bad odour and that does not let any water through. Experts will be able to point out and educate homeowners on what they should avoid doing to look after their drains. Then, you can stop this from happening again in the future.

Avoid DIY Damage

A lot of homeowners want to try to save money. They have this idea in their head that professional services are going to cost a lot. So, when they discover they have a blocked drain, they attempt to try to fix the problem themselves. It cannot be that hard, right? This can include purchasing cheap unblocking products from a local store or attempting to use another method they have found online.

First of all, there is no guarantee that these methods are going to solve your problem and they can be a waste of time. But, trying DIY solutions can actually be dangerous for your home too. If you are not a professional, you can end up damaging your drainage system. For example, a lot of products contain corrosive chemicals that will damage pipes. So, you can use them believing they are going to clear the blockage and you end up causing a lot of money’s worth of damage to your drainage system.

Therefore, unless you have experience, it is best to avoid trying to solve a blockage by yourself. A lot of DIY methods are risky and if you do not know what you are doing, you can cause a lot of damage. Then, you will still have to call in the professionals for the blockage and you might have to pay for repairs to the pipes or overall drainage system. It is not worth taking this risk.

The Benefits of Made to Measure Blinds

Are you shopping for some new blinds? When homeowners are looking for window dressings, blinds are one of the first choices. They allow you to control the amount of sunlight you have in a room, as well as offering privacy if you live on a busy street. You have a lot of flexibility with blinds, choosing to have them closed or lifting them up altogether.

One of the biggest decisions you have to make when you are shopping for blinds is whether to choose ready-made or made to measure blinds. This can be a difficult decision and often homeowners will choose depending on their budget. While made to measure blinds do tend to be more expensive, they offer a lot more advantages than ready-made blinds. Let’s take a closer look.

Enjoy the Perfect Fit

Let’s remember that it is not always easy to purchase ready-made blinds. You might have very large windows that are not a standard size or smaller windows that are on a slant and not commonly found in newer homes. Either way, it is not always possible to purchase blinds that are going to be the perfect fit. So, this is where made to measure blinds are going to come in and save the day. Essentially, you are getting customised blinds and you will be asked about all of the measurements. Then, the blinds will be made to your specifications. This ensures that they are going to fit. For a professional measuring and fitting service, check out Smart Blinds. They have a small family run team that can offer you a personal service that makes sure you are happy with your blinds. With 20 years of experience, you can enjoy peace of mind and know you are going to get what you order.

Do not forget about having perfectly fitting blinds is not just about how they look. It is also going to mean that you are more energy efficient. They can help to cool down a room during the summer by keeping out the sun. Alternatively, they can add some insulation to the windows in the cold winter months. What’s more, perfectly fitting blinds provide the privacy you want in your home.

Select From a Range of Fabrics

If you are shopping for blinds online or in local stores, you will notice that you see similar designs and there are not a lot of unique options. This means that you have to settle for something less simply because these are the options available. But, this is where made to measure blinds are going to be perfect for you. You have the opportunity to make them your own and choose the elements you like about some blinds and merge them together.

For example, you are going to be able to choose from a range of fabrics. This can create a style and texture you love and that is going to complement your home. It does not matter whether you are looking for contemporary or classic, there are going to be made to measure blinds you can create.

Choose a Fitting Service

When you are purchasing blinds out of a store or online, you are simply buying the product. You will take it home and it will be up to you to fit the blinds yourself. If you have ever tried to put up blinds before, you will know that this is not an easy job. In fact, it is very easy to make a mistake and be unhappy with the finished product.

But, a lot of companies that offer made to measure blinds also offer a fitting service. This means that you can have a professional come to your home and install the blinds for you. Sometimes, it is best to leave it to the expert since they have the experience and all of the right equipment to get the job done properly. You can enjoy peace of mind and know that your blinds are going to look as good as you want them to.

Have Better Quality Blinds

Often, you will find that made to measure blinds are simply better-quality blinds. A lot of people that have had them before rave about them and how they are much better than the standard blinds you can buy in stores. While this is going to be something that you judge for yourself, it certainly seems to be a popular opinion. This might be due to the fact that you often have a choice of the materials you can use. You can select a higher quality material that is going to last for years.

An End-of-Tenancy Checklist – For Tenants and Landlords

The responsibilities of a tenant and landlord do not end when the tenancy agreement ends. There is a process to follow and requirements to take care of. Tenants have their own responsibilities and landlords have theirs as well. It’s important that both know what each has to do to ensure an issue-free moving out. 

 Whether you are a tenant or landlord, it is important to follow and do all the necessary steps – from the checkout all the way to preparing the property for the next tenant. To guide you through the process, it is essential to have a tenant or landlord checklist

End of tenancy checklist for tenants

  1. Inform your landlord

Before anything else, review the tenancy agreement to find out if there are terms you may have missed. If you have a fixed-term tenancy and you are moving out before the end of the agreement, there are certain stipulations you need to follow. 

If you have a periodic tenancy, your landlord has to be informed about your plan to move out at least one month before the date you chose. 

You also have to inform the local authorities about your scheduled move. Ensure you provide them with the complete details – the date, where you are moving to, and what your new address would be.

  1. Inform your utilities provider and any other entity that needs your personal details

Give your providers at least a month’s notice before you move out. At the same time, give them your new details – specifically your address and contact number. 

Get in touch with your insurance provider, bank, employer, doctors, the DVLA or Driver and Vehicle Licensing Agency, the HMRC or HM Revenue and Customs, family and friends, and building society.

  1. Check the condition of the property and do a deep clean

One of the terms in your tenancy agreement is your responsibility to keep the property in good condition and leave it in the same condition that it was in when you first moved in. It should be clean throughout the property, so it would be a good idea to do a deep clean. 

A deep clean includes a total cleaning of appliances like the oven, freezer, and microwave (if they were provided free to use by the landlord). Other than these items, though, you also have to ensure all parts of the property are thoroughly cleaned. Pay attention to the windows, fireplace and chimney (if you have them), the gutter, and your backyard, garden, or porch. It’s also important to ensure all linen, curtains, and upholstery are clean. 

  1. Repair decorative damage

Tenants are responsible only for minor repairs, particularly those involving decorative items such as nails, screws, and hooks on walls. Broken or malfunctioning light bulbs should also be replaced with new ones, especially if they were in good condition when your tenancy started.

  1. Document everything you do

After cleaning and organising the property, take photos of every room, corner, furniture, appliances, and fixtures. If you can, ensure all your photos have timestamps. These documents will serve as evidence in case you’ll need to file a tenancy deposit protection compensation claim. 

  1. Ask your landlord for your deposit refund

If you followed all the terms in the tenancy agreement, get in touch with your landlord and inform them you’re ready to move out and the deposit refund should be ready.

Landlord’s checklist

  1. Know the reasons why tenancies end

There are four reasons why tenancies end:

– It is the end of the fixed-term tenancy

– The tenant or landlord files a notice to terminate the tenancy

– The tenant and landlord are in mutual agreement to end the contract

– Eviction or court possession order

If you intend to end your tenant’s tenancy, you must inform them of your decision at least 28 days before the date they should leave. If it is the tenant’s choice to leave, they should send you a notice as early as four weeks before the scheduled move. 

Send your tenant a written notice of confirmation for the end of tenancy. All the pertinent details must be indicated in the notice.

  1. Perform a check-out inspection

A check-out will help you go through the home to verify if there are damages or issues. Be sure to do the check-out with the tenant around so you can talk about how to deal with damages and other issues, if there are any. 

Look out for red flags such as damp, mould, the presence of pests, leaks, faulty smoke alarms and detectors, blocked gutter and drains, appliance issues, and stains that do not belong to the wear and tear category.

  1. Refund tenancy deposits

If you are a responsible landlord, you’d have protected your tenant’s deposit through any of the three government-approved tenancy deposit protection schemes. Now that your tenant has moved out and ended the tendency, you have to be the responsible landlord that you are and hand over their deposit refund. You have to do this within ten days, especially for custodial scheme protected tenancies). 

You and your tenant must compromise and come up with a deposit refund settlement that benefits both parties. 

If landlords do not return deposits

There are landlords who do not respond to deposit refund requests and there’s a landlord who has not protected a tenant deposit. Situations like this delay the process, so you should take action against such landlords by filing a tenancy protection compensation claim.

Get in touch with a team of expert solicitors, such as the ones at Tenancy Deposit Claims, who are authorised and regulated by The Solicitors Regulation Authority. They are highly experienced and committed to helping tenants like you win tenancy deposit claims.