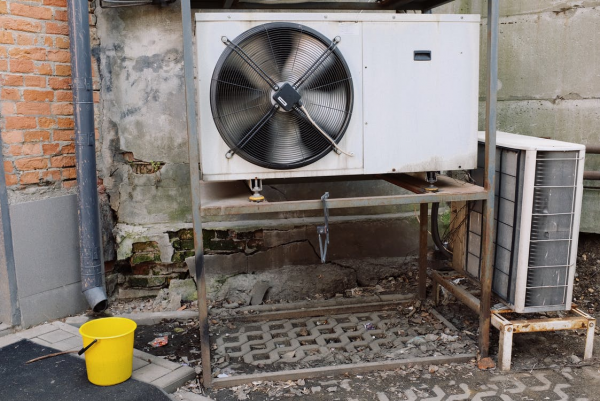
4 Useful Tips for Maintaining a Pellet Stove

Maintaining a pellet stove is not as difficult as it may seem. While fireplaces and wood stoves create a lot of dirt and generate ash, with a pellet stove, combustion is more regulated, and the amount of ash produced is significantly less, especially when you use high-quality pellets.

That is why the maintenance operations of pellet stoves take no longer than a few minutes. Below, we provide four valuable tips for maintaining a pellet stove that will help keep your pellet stove burning and operating at its best.

1: Boost Efficiency with Routine Soot Sweeps

To maintain pellet stove parts for less effort, brush away collected ash, soot, and sawdust every week. Cleaning the feed areas and the hopper is not tricky, but visit the site to buy accessories such as a cleaning set with an ergonomic dustpan and broom to simplify your job.

Before you sweep excess ash, soot, and sawdust away, ensure that the pellet stove has cooled. Use fire-resistant tools to do this and ensure that you dispose of ash safely to avoid re-ignition.

2: Clean Your Stove’s Window Regularly

To maintain your pellet stove parts for less time, clean your pellet stove windows every week. Ash, soot, and grime build up quickly on the glass, blackening your view. If you put off cleaning until the end of the season, the cleanup may take more time than a weekly wipe-down.

Before cleaning the glass, ensure that it has cooled off completely. Also, use a lint-free cloth or newsprint as a cleaning rag and dampen the rag with water or vinegar to wipe away the glass.

3: Use High-Quality Pellets

When you use premium-grade wood pellets, your heating costs may go up a bit compared to standard wood pellets. However, with premium grade pellets, you avoid the soot and ash buildup common with standard pellets, making the extra expense beneficial.

To maintain pellet stove parts for less effort, use pellets with a moisture content of 10% or less. If your pellet stove also burns wood shavings, corn kernels, and nut shells, buy the highest quality of these alternative fuels.

Use fuels without multiple types of glue and fillers to avoid excess smoke, soot, and ash in your pellet stove. Additionally, look for pellets that are PFI (Pellet Fuels Institute) certified.

4: To Maintain Pellet Stove Parts For Less Money, Service Your Pellet Stove Each Autumn

Have your local fireplace service your pellet stove each autumn. The professionals know how to check for dirty, broken, or missing components in your pellet stove. The professionals can also maintain pellet stove parts for less money by lubricating and replacing parts as needed, checking whether all parts are functioning optimally, and spotting and fixing problems before they morph into costly repairs.

Maintain Your Pellet Stove

If you fail to maintain your pellet stove, it might not work as well over time, you can lose airflow, temperature control, and the ability to light your stove, and you risk damaging your heating equipment. By following the above tips, you can perform maintenance operations on your pellet stove and improve its lifespan by years.

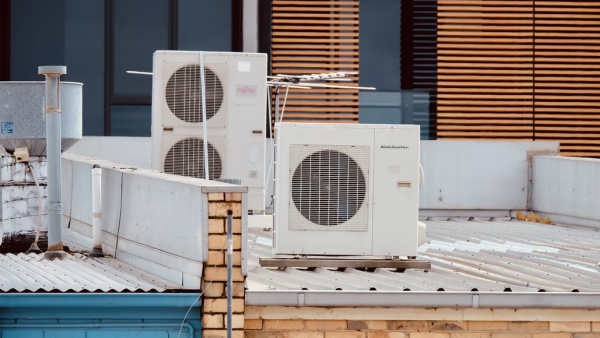
5 Exterior Home Maintenance Tips To Keep Your Home In Tip-Top Shape

Keeping your home in tip-top shape can be challenging, especially if you have a busy schedule or don’t know much about home maintenance. If you need some help with basic exterior housekeeping, here are five tips to keep your home looking its best:

1. Check your exterior paint

The first thing you should do is check the color of your home. Is it the same as before? If so, great! If not, it could be a sign of peeling paint and cracks in the wood. To test whether or not there’s any cracking going on and to check if there is rot, lie down on your stomach with your head close to where you want to inspect. 

From this vantage point, look straight ahead at the bottom edge of one plank of wood (don’t use boards). The planks should look like they’re joined together tightly, so it’s hard for light to pass through them; if they don’t appear well connected, there may be some rot in those areas that need attention.

2. Look for damage to your exterior sidings

Now that you know what to look for when inspecting your home’s siding, it’s time to address any damage. Your main goal here is to ensure the siding is in good condition so you can avoid unnecessary repairs down the road. 

So, if there are cracks or stains on your sidings (or even just a few small holes), repair them as soon as possible with a product like caulk or wood putty. If the damage is more extensive than a small crack or hole, consider hiring an exterior painting expert from a reputable company—they’ll be able to look at the entire surface and determine whether anything else needs repair before painting begins.

If you’re looking into repairing an area yourself, keep in mind that it might require some skill and knowledge beyond what you currently possess but don’t worry! Plenty of do-it-yourself instructions are available online for almost every type of material used in siding construction today, vinyl being one example.

3. Check for roof damage

A roof is the single most important part of your home’s exterior, so it’s important to check for damage regularly.

When checking for roof damage, look for missing or damaged shingles and flashing. The flashing can be damaged by tree branches or landscaping items such as bushes and flowers that may have been planted too close to your home’s foundation.

You should also check for any damage to your gutters, which carry rainwater away from your home’s exterior. If they’re full of debris from fallen leaves or other debris from trees, you should clean them out before winter arrives so ice doesn’t build up inside them during cold-weather months.

Finally, ensure there aren’t any cracks in your chimney that could allow water in over time or even worse: heat loss.

4. Check for window damage

There are a few things to look for when checking the health of your windows. First and foremost, you want to check for cracks and chips in any glass surfaces on your window frames. If you see these, they can be repaired easily with tinted caulking or plastic kits that can be purchased at most hardware stores.

 The next thing is to ensure there aren’t any broken seals around the glass panes or anywhere else on the frame that might cause air leaks or drafts coming into your home. This can be a serious problem if it goes unchecked because it will lead to higher energy bills and more wear and tear on your HVAC system due to having to work harder than normal. 

 Lastly, double-check all locks between screens are locked properly, so no one accidentally walks away from their house with them still opened up. Unfortunately, this happens more often than you’d think. If you need help with window damage or just want to replace your windows, you can contact a service similar to Energy Shield Window & Door Company for help. 

5. Inspect your driveway and make repairs if necessary

Check for cracks and potholes. Your driveway is a large investment, so ensure it’s in good condition before the winter weather sets in. Look for damage to curbs, sidewalks, and the concrete itself. While you’re at it, inspect your yard and sidewalk, too—if they need repair or replacement, now is a great time to do so while they are accessible.

Conclusion

We hope these tips will help you keep your home in tip-top shape. As always, if you have any additional questions or need more help with your exterior home maintenance needs, please do not hesitate to contact us!

5 Signs That It’s Time To Call In The Drainage Experts

When it comes to managing and maintaining the health of your drains and water system, knowing what to look for is key to preventing damage or structural decline. And while there are things you can do to ensure the health of your drains up to a point, understanding when it’s time to call a professional drainage company in London is important.

Without further ado, here are 5 signs that it’s time to call in the drainage experts and outsource the upkeep of your drains to a team who knows what they’re doing.

1. If The Drains Smell

The most obvious signs of a drainage issue are bad odours and smell. These smells are caused by a blockage in your pipes which is preventing everything from your sinks and toilets from disappearing – with the build-up creating an unpleasant, pungent, and unmistakeable odour.

2. If Your Drains Are Emptying Slowly

If your drainage is slower than usual, this can be a sign that there is some kind of blockage which needs professional attention and removal. A blockage can be caused by unwanted and foreign objects in your pipe system, or by a build-up of grease, fat, and hair which makes its way down the drain on a daily basis.

You can help to alleviate this issue by ensuring you don’t flush foreign objects down the toilet or sink, however some build-up is natural.

3. Your Drain Is Noisy / You Can Hear A Gurgling Sound

Some noise around your drains is normal, however an excess of gurgling generally means that air is becoming trapped in and around the debris which is clogging your drain. There are some at-home remedies that can alleviate minor blockage, however in many cases this will require the work of a drainage company to come and unblock your pipes.

4. You Can See Flooding In Your Garden

If the ground around your pipes starts to become saturated with water, this means that the drainage system is not operating correctly. This is often accompanied with a smell that is hard to ignore.

5. Your Toilet Is Regularly Becoming Clogged

If you keep noticing that the toilet bowl fills up when you flush, rather than draining quickly, there is often something in those pipes which is preventing the water from flushing properly. Not only does this indicate a problem somewhere in the system, but it can also do damage to the infrastructure of your bathroom if left untreated.

Call In The Experts

If any or all of the above signs are familiar to you, get in touch with a professional drainage company in London – being sure to ask for a quote and timeline as to when they can fix your problem.

Here at London Drainage Facilities, we pride ourselves in offering an efficient and cost-effective service to clients across London and beyond.

10 Reasons Why Your Ducted Air Conditioner Has Stopped Working

There is nothing more frustrating than an air conditioner that won’t work. Knowing what the problem is can save you a lot of work. By the time you have to search a term like “AC repair Glendale AZ” to find a workman, it is because you’ve exhausted all your diagnostic and DIY options.  To help you, we have made a list of the top things to look out for and check on when your AC has stopped working. But if you are not a do-it-yourselfer, it may be a good time to call a local AC repair specialist anyway.

To help you, we have made a list of the top things to look out for and check on when your AC has stopped working. But if you are not a do-it-yourselfer, it may be a good time to call a local AC repair specialist.

10 Common Reasons

Below you can check out the most common reasons for air conditioning repairs. Finding the problem means you’ll get to a solution much faster!

The Thermostat Is Malfunctioning

See if the thermostat display is lit, and check the batteries. If the display is off, it cannot tell the AC to turn on. 

If the batteries seem to be in good condition, check the thermostat. If the AC is not turning on, switch the thermostat off and look at all of the AC’s components. 

Look for any corrosion or debris, and keep an eye out for a broken fuse. You can also check loose wires or screws. One of these may be the culprit! 

Air Filters Are Clogged

The AC can’t function if the air filters are clogged up or dirty. Cleaning the AC filters is vital! The filters allow air to circulate, and dirt can easily block the airflow.

Dirty filters may even freeze the outdoor AC unit, and then your AC will not turn on. If this is the case, you can clean the filters or call in a professional. Once you’ve cleaned the filters, let them dry before turning the AC back on again.

Refrigerant Shortage

The refrigerant is responsible for providing cool air, and it is a fluid found in the coils of the AC. If it is a refrigerant shortage, it is most likely due to a leak – cracks tend to build up over time in the coil, and this causes a leak.

This can be avoided through regular maintenance. If this is the problem, you will need to get a professional to come in and resolve it.

The Capacitor Has Failed

The capacitor is vital to the system and is connected to the circuit of the motor. Its job is to give the motor a push to start. It then disconnects from the motor’s circuit when it gets to a certain speed.

The capacitor may have died due to overheating, power fluctuations, or just because it is old. All you need to do is call an electrician, they will replace the capacitor, and your AC will be up and running.

The Switch

Check the on/off switch. This should be the first thing you check. There’s a chance that the AC has been switched off. Then turn it back on, and you are good to go!

Dormancy Problem

Check the fan of your AC. If it won’t turn on, it is likely a dormancy issue. This usually happens after the winter months when the AC has been standing still for a long time, and there may be some built-up dirt. An expert can quickly resolve this issue for you.

The Circuit Breaker Tripped

Take a look at the circuit breaker. If it has tripped, then the AC won’t be able to turn on. It may have tripped due to power surges or because you used a high voltage appliance.

Turn the air conditioner circuit breaker off and give it a few minutes before putting it back on again.

Dirty Condenser

If not properly maintained, the condenser can get very dirty. A dirty condenser will draw too much current and trip the circuit breaker. You will need to get it professionally cleaned.

Motor Is Damaged

Listen out for grinding sounds – it is a clear indicator that the motor is malfunctioning. Over time, the oil in the motor seeps out, and without oil, it can’t work correctly. This may mean replacing the motor, but you may need a whole new HVAC system in some cases.

The Drain Pan Is Clogged

The drain pan can easily get clogged up if not cleaned or maintained. There are two drain pans, and when both get clogged, the float switch gets triggered, turning the AC off.

The AC will only turn back on once the pans have been cleaned and the switch is turned back on.

Final Thoughts

The best way to avoid any problems is to have regular maintenance done. This way, you can catch problems early on and won’t struggle too much with your AC. But no matter the problem, there is always a good solution!

5 Reasons You Should Not Repair a Garage Door on Your Own

Garage doors are a vital part of your home’s security system. Aside from protecting your cars and other garage valuables from the weather and the elements, a top grade garage door also helps prevent break-ins in your property. These distinct functions of a garage door and the heavy use it experiences every day can expose the structure to internal wear and tear. However, with the proper maintenance and tune-up routines, your garage door can last for years while maintaining its aesthetic appeal.

Troubleshooting a garage door is not as easy as it seems, and it’s definitely not a DIY project you should pursue. Interested to know why? Learn more on this Garage Door Repair Calgary blog.

Garage door repair tools and equipment can be expensive.

So, you want to repair a failing garage door on your own to save money. Think again. If you don’t have the essential tools and materials, you will have to buy them all at a costly price. That defeats the purpose of a DIY project. On the other hand, you got nothing to worry about when hiring the pros because they are fully-equipped to conduct a garage door repair, whether commercial or residential.

You could probably make it worse.

Garage door repairs may seem easy to look at until you have to do it yourself. You may not even know where to start and could risk causing further damage. Many homeowners have turned a simple repair work into complex and costly ones just because they don’t precisely know the root cause of the problem in the first place. Without the required knowledge and skill, it would be impossible for you to pull off a garage door repair.

Serious accidents can happen.

If you have a tall garage door at home, you will need to climb off a ladder to get to hard-to-reach areas. Without a sturdy ladder to use, you can be a victim of a serious fall accident. Another safety threat in garage door repair is getting your hands stuck in between cables or springs during the repair. To prevent accidents from happening in your property, just leave the garage door repair work to a licensed repair technician.

It could take a lot of your time.

Depending on the size of the repair job, it will only take several hours for professionals to get your garage door back to proper functioning. On the contrary, you can spend a day troubleshooting repair issues and still don’t get any positive results. Your whole day wasted on an uncertain DIY job instead of spending it with family and friends. A delay in garage door repair will also leave your residential property vulnerable during the night.

Issues can occur without proper treatment.

DIY fixes are temporary, and issues can occur at any time. You will never get a highly functional door back unless it’s well-inspected by a professional eye. Plus, imagine the high repair cost you have to pay once the problem has escalated. If you want to save money in the long run, you should consult the pros at first sight of the problem.

Beyond just addressing the immediate malfunction, a reputable professional will conduct a thorough assessment of your entire garage door system, identifying potential future issues before they escalate. This comprehensive approach often includes checking springs, cables, rollers, and openers for wear and tear, ensuring all components work in harmony. Such detailed attention not only extends the lifespan of your garage door but also enhances its safety and efficiency for years to come. Investing in quality garage door service from experienced technicians means gaining peace of mind, knowing your property’s security and functionality are in expert hands.