Keep Your Garage Free of Clutter With These Storage Tips

Whether you live alone or in a family of five, your garage is most likely to be the messiest and disorganized part of your home. A garage is a place for workshopping, exercising, or creating, but for most families, it is a place of storage. From old clothes to power tools and bicycles, most garages are littered with a variety of items. If you’re looking to revamp your garage and give yourself some peace of mind, working on your storage is a good start.

Cleaning out the garage can be tough, but armed with the right tips and tricks, anything is possible. Whether you’re looking to deep clean, re-organize, or declutter, here are some tips and tricks to improve your garage storage. Follow these simple tips, step by step, and watch as your garage changes before your eyes!

Dispose of unwanted clutter

The best way to start tackling a cluttered garage is to start sorting out its contents and get rid of what you don’t need. An easy way to do this is to organize the miscellaneous items in your garage into three piles; keep, donate, and throw away. This may take a day or two, depending on the amount of clutter, but it goes a long way to cleaning up your garage. Once you’ve separated your clutter, you can work on organizing and storing a third, while getting rid of and donating the rest. Improving your garage storage starts with getting rid of what you don’t need anymore.

Plan out your storage

Before you start improving your storage space, it’s a good idea to plan a few things first. Having a layout for your garage can help you better visualize and utilize the space. Allocate areas for different items based on how frequently they’re used, what they’re used for, or their size. For instance, you can store bulky items on the ceiling using overhead shelves, available at The Smarter Garage, so they don’t get in the way or cause accidents. Likewise, you can keep smaller items in boxes or drawers to ensure they’re easy to find and don’t get lost. Planning saves you time and energy when it comes to decluttering your garage.

Keep items off the ground

A garage with a cluttered floor is an accident waiting to happen and a disorganized safety hazard. A great way to store your items better and to make your garage safer is to keep your items off the ground, which can be done in a few ways. Depending on your preference, hooks, and overhead storage units are the most popular. Whether you’re in need of overhead garage storage or some simple shelves, be sure to do some research into what fits best for your space. Keeping things off the ground is a great way to reduce clutter and make your garage safer and easier to clean.

Use your wall space

Apart from storing things above your head, you can store things at eye level in the garage, by using your walls. Every garage has a limited amount of wall space, so it’s important to not go overboard and to use it wisely. There are plenty of ways to hang and store things on your garage walls, so you can get quite creative. Use shelves, hooks, baskets, grids, or even wheelbarrows hammered into your walls! Depending on the kinds of items you have lying around, there are plenty of ways to keep them on the walls and off the floors.

Store items in boxes

Using boxes to store your garage items may seem counter-intuitive, but if done right, can vastly improve your garage storage. If you’re able to organize your items into boxes, you can protect them from the elements, keep them out of sight, and find them easier. There are plenty of different storage mediums to use from boxes made of plastic, wood, or metal, to glass jars and wired baskets. 

Choosing the right container is important so make sure to think long and hard about which ones to use. Each storing medium has its own pros and cons depending on the item in question, so don’t be afraid to compromise. If you’re going to be using boxes, make sure they’re sturdy, stackable, and labeled properly. Remember to keep things in their places and to label, to find them easier in your boxes. 

Regularly clean your garage

Decluttering and re-organizing your garage is harder to do if your garage is messy and unclean. The fine dust that accumulates in closed spaces like garages is not only a health hazard but makes decluttering harder. If you want to make better use of the space and be able to organize easier, make a habit of keeping your garage clean. Set aside a day or the week or month, depending on the size and state of your garage, and get to cleaning. A clean garage is better for your health and mood, and remember, cleaning regularly is easier to do than a full-scale garage deep clean.

Have good lighting

Whether you’re planning on sorting, organizing, or cleaning out your garage, you need to make sure it’s well lit. Decluttering and finding your items in any garage is hard enough, especially when there’s no light. Having a well-lit garage makes things less dark and gloomy, and makes it easier to clean out and organize. Natural light is good during the day, but it’s important to have enough light at night too. Upgrade your garage lighting and electrical systems to add value to your home and make working in your garage easier.

So there you have it! Decluttering your garage takes a lot of hard work, but you can improve the storage of any garage with the right tips and tricks. Start off your decluttering journey by throwing out what you don’t need, and by planning out your space. A little planning beforehand makes the world of a difference when tackling your garage storage. 

Keep your garage floor clutter-free by storing things off the ground on the walls and ceiling. Experiment with boxes for your items and label them to keep them safe and to find them easier. Don’t forget to keep your garage clean and well-lit to make organizing easier! Follow these tips and you’re on your way to having the most organized garage space ever!

Questions You Should Ask When Buying a House

Buying a home is a significant commitment and investment, so it’s vital to ask questions during the home-buying process to ensure you have all the best information.

Once you have a couple of potential properties on your list, you still have to do the most crucial part, asking the right questions. In this regard, many people wonder what to ask when buying a house in Beverly Hills. The only way to get all your answers is by knowing which questions to ask when buying a home. 

Why is the Owner Selling?

You should find out why the owner is selling the property because it can help you out during the negotiation. Knowing why the homeowner wants to sell can significantly inform your decision. If they’re selling because they’ve taken a new job in another city, they may be hoping to sell quickly and willing to lower the asking price. If they’re selling because there’s an issue with the house, you may be able to get a better deal or look elsewhere. A realtor like Kellycaldwell.ca would be able to assess the situation and see what the best move would be.

If you feel uncomfortable asking this question directly, this is one of the reasons having an experienced real estate agent, like those at Michael St. Jean Realty, is such a big help. They can ask the question themselves or track down the information for you.

How Long Has the House Been on the Market?

If the house has been on the market for a significant length of time, that may indicate that the price is too high or that the property has a major issue. Finding the answer to this question can help prospective home buyers determine whether the seller is desperate to sell and likely to accept a lower offer.

How Old is the Roof? 

The roof is one of the most expensive parts of a house and a common deal-breaker during house sales. A roof that’s over 20 years old may need costly repairs sooner rather than later, depending on the level of care. 

A well-installed and well-maintained roof can last for 30 years or longer, while a poorly installed or poorly maintained roof might need replacement after five or 10 years. Look at the roof carefully for signs of wear or damage and keep an eye on issues listed in the home inspection.

How Old are the Appliances?

It’s easy to be dazzled by 12-foot ceilings and other aesthetic features, but you need to pay attention to the inner workings of the house, like the HVAC system, water heater, roof, electrical system, and plumbing.

Major systems like air conditioning or heating have finite lifespans, and it’s essential to know how old they are to gauge how much longer they’ll work before they need replacement. If the house’s appliances are at high risk of failing soon, you may be able to negotiate a better deal or have the seller cover some of the closing costs to make up for the price of repairs or replacement.

These are just some of the questions you should be asking when you’re looking for a new home. Arming yourself with the right information will help you make a good decision when making such a significant investment.


A Brief History of Engagement Rings

A diamond ring on someone’s left hand has long been a universal sign of engagement, but what this ring signifies today is not what it has always represented. As ideals and gender roles have become more fluid and forward-thinking, the intent and messaging behind these rings has drastically changed.

Years of tradition and advertising first made the engagement ring a symbol of commitment exclusively for women. What is now worn as a sign of commitment, collaboration, and hopefulness for the future wasn’t always so progressive. Over time, society and ring manufacturing has come a long way to make the engagement ring a statement that anyone can wear with pride.

To understand the weight and evolving messaging of engagement rings, it’s important to consider how these rings came to be, the innovation of materials used to create them, and the culture created behind them.

Origins of the Ring

It’s difficult to determine precisely when and where engagement rings originated. Some historians believe these rings were first seen in Ancient Rome, when Pope Innocent III declared that there had to be a waiting period between engagement and marriage. At the time, rings were made of copper, ivory, flint, iron or even bone, and they didn’t have stones like they typically do today.

Nowadays, engagement rings are frequently crafted of ethically sourced diamonds or gemstones such as sapphires or morganite. If a traditional looking colourless centre stone is what you’re after and environmentalism is a priority, you can work with a ring designer to find your perfect lab grown diamond or moissanite. These stones have a less significant environmental impact than earth-mined diamonds but are just as stunning.

The Evolution of the Engagement Ring In the 12th century, Pope Nicholas deemed engagement rings the official symbol of a man’s intent to marry a woman. This is how and when engagement rings started to become common practice.

Engagement rings remained simple until 1477 when Archduke Maximilian of Austria proposed to Mary of Burgundy with a diamond ring. Although he was the first to do such a thing, diamond rings didn’t become popular until almost 500 years later when De Beers launched a campaign with the slogan, “A diamond is forever.”

After that campaign, diamonds remained the standard stone for engagement rings for decades and became widely known as “a girl’s best friend.”

Essential Tips for Moving Your House

Moving your house is a huge undertaking. It can be stressful, time-consuming, and expensive. So it pays to get organized before you start packing up the furniture and moving boxes into the truck. Here are some essential tips for moving that will make this process easier for everyone involved!

Make Sure You Have Enough Help

It is essential to ensure you have enough help when moving your house. You should ask friends and family if they would like to assist in the process or hire Rent a Son Movers for larger tasks. Make sure you have all the necessary tools before starting your moving project, so things go smoothly.

Pack Strategically

When packing your house, it is crucial to fill it strategically. Begin by packing the items you use least often and save the items you use most often for last. This will help make your move less stressful and faster. Next, label each box with what room it belongs in so you can easily find them when unpacking.

Pack Heavily

When packing your boxes, be sure to pack them heavily. This will help ensure that they do not get damaged during the move. If possible, use sturdy boxes instead of cardboard boxes. You can also fill empty spaces in boxes with towels or newspapers to help keep their contents secure.

Create a Moving Check

By creating a moving checklist, you will be able to make sure that you don’t forget any essential items. You can also avoid hassles by staying organized and not making assumptions about what should happen in the new house.

Use a dolly or furniture pads to move large furniture pieces. Trying to carry these items by yourself can be extremely difficult and may lead to injury.

Label your boxes. This will help you know where everything goes when you unpack in the new house. It will also make it easier for movers if they need to move any of your belongings.

Budget for Your Move

You need to budget money to move your house correctly. Ensure you know how much it will cost and include that into your total monthly expenses when planning out what living arrangements are best for you. You should also plan to make arrangements for where you will be storing your belongings if they do not fit in the new house or apartment.

Pack Smartly

When packing for your move, it is important to pack smartly. You will want to make sure that everything you need is packed and that nothing is damaged. Pack heavier items on the bottom of boxes and lighter items on top. This will help keep the boxes from breaking and make them easy to carry. If you are moving a long distance, we recommend using wardrobe boxes instead of cardboard ones. 

This is because they can fit your hanging clothes without wrinkling or getting damaged in the box, which means that when you unpack at your new house, everything should be ready to wear right away!

Get An Estimate Of How Much Everything Weighs

One of the first things you will want to do is estimate how much everything weighs. This will help you determine what type of moving truck or container you will need and give you a good idea of your overall moving costs. You can find moving truck sizes and prices online.

Get Professionals To Help

Moving your house is a lot of work and can be very stressful. If you don’t have the time or energy to do it yourself, hire professionals or a moving company to help you. You can find several companies that offer moving services at an affordable price on any online search engine, so why not take advantage of them? They know what they’re doing and will make the moving process much smoother for you.

Mark The Boxes Properly

Mark each box in a way that helps you remember where it goes. For example, mark the living room boxes with “L” and kitchen boxes with “K.”

Don’t forget to write your name on all of your belongings, so they don’t get lost!

Have a Home Layout Available

It is essential to have a plan for your new home when you are moving. This means having the furniture placed in the correct spots ahead of time. You do not want to be running around trying to figure out where everything goes on move-in day. Having a layout will also help keep you organized and ensure that you have enough space for everything.

In conclusion, moving your house is no easy task, but it will be a lot easier if you are prepared with the right tools. Many things can come up during the moving day, and by preparing yourself beforehand, you can limit any potential damage or injuries to property. With some planning ahead of time and taking safety precautions seriously throughout the process, there should be no problem moving a house.

How to Fight Off a Cold Naturally

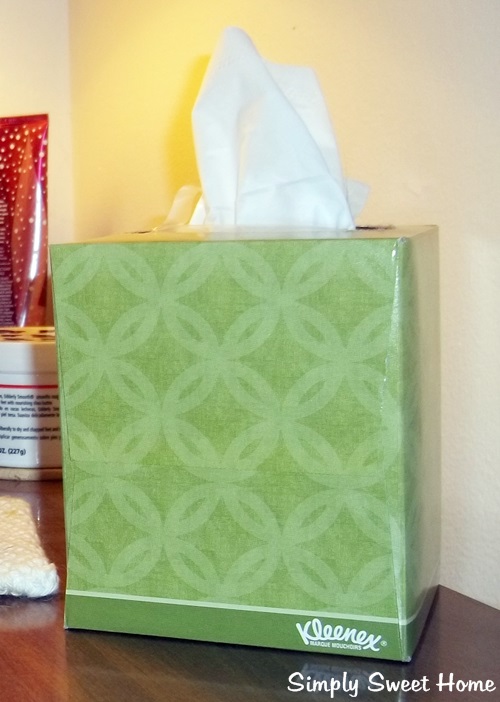
Getting a cold is one of the most irritating and frustrating things that can happen, yet it’s something that most of us experience at least once a year. When your nose is stuffy, your head is foggy, and your throat is scratchy, it can feel like you’re a lost cause. No amount of paracetamol, ibuprofen, and VapoRub seems to save you from the dreaded effects of the common virus.

You’re often laid in bed, trying to clear your nose, reminiscing about the days when you could breathe with ease. At this point, you’re desperate and ready to try any remedy at your disposal. Anyone in a nursing job, in Guernsey or otherwise, will tell you that colds are among the most common complaints that they receive. However, there is no immediate cure for the common virus. Despite this, the following natural remedies are thought to be extremely effective in fighting off a cold.

Garlic

Upon noticing your first sniffle, you should reach for the garlic as this particular plant assists you in the building of your immune system. Garlic is a natural antibiotic, meaning that it’s capable of inhibiting or killing harmful bacteria in your body. You can consume garlic in the form of a tablet or simply add it to your food. Ultimately, garlic will put your body in good stead to fight off any viruses.

Vitamin C

Vitamin C is a vital ascorbic acid that assists the healing of wounds, maintains healthy bones, cartilage, blood vessels, and skin, and protects your cells to keep them healthy. You can consume vitamin C in a variety of fruits and vegetables such as potatoes, Brussels sprouts, broccoli, blackcurrants, strawberries, peppers, and citrus fruits and juices. However, you can also buy vitamin C tablets and consume it in this way.

Grapefruit Seed Extract

Mixing around 10-20 drops of grapefruit seed extract in orange juice and quickly drinking this is another method of aiding a cold. This is due to the high levels of vitamin C in the grapefruit and orange juice alike. As previously mentioned, this keeps your cells healthy and protects them from potential threats.

Elderberry Juice

Elderberry juice or extract contains antioxidant flavonoids that shield your cell walls from foreign substances. As a result, it’s an effective defence against colds and fevers.

Apple Cider Vinegar

You’ve probably heard enough about the seemingly endless benefits of apple cider vinegar but, the truth is, it’s actually highly effective in fighting off colds. Not only does it soothe your sore throat, but it can play a huge role in the rebuilding of your immune system. This is due to various helpful proteins, enzymes, and friendly bacteria that are enhanced during the fermenting process.

Eucalyptus Oil

One of the most irritating symptoms of a cold is the constant congestion and this is where eucalyptus oil comes in. Placing eucalyptus oil in a humidifier is a great way of relieving your congestion as you try to sleep. However, this particular oil can affect blood sugar levels and shouldn’t be inhaled by people to who this could be detrimental.

Honey

Honey, especially New Zealand Manuka honey, is good for colds due to its high level of antioxidants and its antifungal and antibacterial properties. As a result, sore throats and coughs are often soothed through honey consumption.

Ginger

Ginger contains gingerol, which has powerful medicinal properties to treat colds, coughs, sore throats, and even nausea. However, people with bleeding disorders, gallstones, and those taking blood-thinning medication should consult their doctor ahead of consuming ginger. Additionally, it should be avoided two weeks prior or subsequent to surgery.

How to Prepare Your Garden for Winter

The bitter temperatures that winter brings aren’t always forgiving to our gardens and plants. The way you look after and protect your garden in the winter months will pave the way for how your plants produce and perform in the new year. No one wants their once thriving vegetable patch to be filled with weeds, and precautions need to be put in place to stop this from happening. Not only does prepping your garden for winter protect your existing plants, but it also helps revitalise and recharge your soil ahead of the new season.

Consider Artificial Lawn Whether you’re based in New York or Bromley, artificial grass is a method of ensuring that your garden doesn’t suffer the consequences of winter. Since it isn’t a natural solution, synthetic grass isn’t affected by environmental conditions, meaning that it’s able to withstand the wintry frosts. Similarly, it won’t drown as a result of the repetitive rainfall that is often experienced in winter.

Remove All Spent Vegetables

When left to decay and rot, vegetable plants can cause serious problems for the following growing season. Therefore, it’s imperative that you remove your spent vegetable winter plants in anticipation of the winter season. Old rotting plants are ideal environments for pest populations and disease to fester in. This creates problems for when these plants drop seeds that will continue to germinate and steal even more nutrients. Therefore, dying plants should be pulled and cleared from your garden as soon as possible. Similarly, you’ll need to dispose of any fruit or veg that may have fallen to the ground.

Add Back Organic Matter

We’re often led to believe that preparing a garden for winter means that you should merely leave it bare and exposed. However, this isn’t necessarily the case. Instead, you should be adding some power to your soil by incorporating some organic matter. Typically, winter isn’t the ideal time to be growing vegetables, making it the perfect time to power your soil.

Since vegetables soak up all the soil’s valuable nutrients for growth, your soil will suffer as a result if not properly treated. Key minerals such as phosphorus, potassium, and nitrogen will slowly disappear from soil over time, which isn’t helpful to your future plants. Organic matter can be added in the form of shredded leaves, animal manure, or compost. The nutrients of each of these will break down and leach into the soil during the winter months ready for the new growing season.

Cover Soil

One of the biggest mistakes that you can make as a gardener is to leave your soil bare and exposed throughout winter for multiple reasons. Firstly, this allows valuable garden soil to be swept away and erode. Secondly, it permits weeds to find a path to lie in. The best way that you can protect your soil and the organic matter that you’ve layered over the top is by planting a covering crop. Not only does this protect your soil from the potential threats of winter, but it also provides it with the nutrients it was previously lacking. However, if it isn’t

possible for you to plant a covering crop, you should implement other measures to cover your soil. This can come in the form of a large tarp or a thick coat of straw or leaves.

Conclusion

Make sure that your garden is in the prime position to tackle winter with the above tips. You can make certain that the following growing season will be one of the best with the right measures in place. Take pride in your garden this winter.

Gestational Diabetes Signs, Symptoms, Causes And Treatment

Diabetes is becoming a widespread problem in the United States and abroad. It is common for Americans, Puerto Ricans, Mexicans, and others to be diagnosed with diabetes. Nevertheless, patients must understand that there are numerous varieties of the ailment. Therefore, it would be smart to learn as much as you can about each version. Some are commonly diagnosed in female patients while others are only found in female patients. One type of diabetes that is only found in women is gestational diabetes. What is this type of diabetes ailment?

What should American women understand about the causes, signs, and common symptoms of the ailment? The guide below will comprehensively cover gestational diabetes.

Fundaments First, possible patients should gain a full understanding of this type of diabetes. What is it? How will it impact female patients around the world? Ultimately, this type of diabetes is only developed by pregnant women without diabetes. If you don’t properly care for yourself during your pregnancy, there is a risk that you’ll become a diabetic. During a female patient’s pregnancy, there is a good chance that they’re going to experience insulin resistance during the later stages.

Pregnant Americans, Asians, and Canadians and potentially offset the risks by taking care of their health. Exercising regularly and changing your diet could make a huge difference. Consult with your favorite medical professional to find out which methods will help you remain healthy.

Potential Causes of Gestational Diabetes

Now, readers around the world should learn more about the primary causes of gestational diabetes. What will cause someone to develop this ailment? Does it have something to do with the patient’s diet or pregnancy? Ultimately, readers must understand that pregnant female patients are the only ones vulnerable to the ailment. Someone will be diagnosed with the ailment once their body is unable to produce a sufficient quantity of insulin. The primary difference of this type of diabetes is that it occurs during her pregnancy. During a female pregnancy, women will encounter a variety of changes.

Her body is going to create more hormones. In addition to this, she will begin losing weight. As a result, there is a higher risk that her body will be unable to use insulin properly. As this happens, the patient will develop a condition referred to as insulin resistance. Someone with this ailment will require more insulin. Their body needs additional insulin to remain healthy. During most late pregnancies, all women will experience some degree of resistance. Unfortunately, certain American female patients have insulin resistance before conception.

These female patients will be far more likely to experience gestational diabetes.

Symptoms & Signs

Although many female Americans do not realize it, the condition typically does not cause any noticeable systems. Pregnant consumers must be cautious about this condition. You may experience it without realizing it. If this problem occurs, you may encounter bigger problems. After all, you won’t know what you’re currently dealing with. Therefore, females who are pregnant around the world should undergo regular testing to minimize the risks. Once she has been diagnosed with the ailment, she should begin taking steps to combat the issue.

Treating The Ailment

Thankfully, pregnant females around the world can do things to combat this problem. Using medications available at CanadianInsulin.com can help. Furthermore, there are other methods for easing the issue. First, she needs to begin checking her blood sugar levels consistently. It is vital to ensure that they remain in a safe, healthy range at all times. Furthermore, you can begin changing your diet. Eating healthy foods will prove to be vital. Don’t forget to get off the couch and get extra exercise. Take your pooch for a walk or ride a bicycle. Remaining active can help.

Finally, you must remember to pay close attention to your baby’s health.

Knowing Your Risk Factors

Every female is at risk of developing gestational diabetes throughout her pregnancy. Unfortunately, some women are at a higher risk because of specific risk factors. It is crucial to know your gestational diabetes risk factors. Speak with your gynecologist or primary care

physician about gestational diabetes immediately upon a pregnancy diagnosis. This is where a lot of females go wrong. They ignore their risk factors, putting them in a dangerous situation at the onset of symptoms.

Being overweight before pregnancy increases your gestational diabetes risk. Evidence shows obese females increase their risks of developing the condition by eight times. Overweight females increase their risks by half of that of obese females.

5 Things You Should Do When Planning To Conceive

Conceiving, going through with a pregnancy, giving birth and raising a child is an involved and ongoing process. It’s important to start planning and preparing as early as you can, as well as doing your research about fertility and eggs.

1. Learn To Predict Ovulation

One of the most important things you need to do when you’re planning to get pregnant is to predict your ovulation cycle. Being able to predict or pinpoint your ovulation days each month will give you a better idea of when you’re more likely to conceive. You can use a calendar or app to track your period, check for changes in your vaginal secretions or monitor your basal body temperature for any changes.

2. Stay in Touch with Your Doctor

You should let your doctor know when you decide to try to get pregnant. Pregnancy is a medical situation and many expectant mothers require various degrees of healthcare and support from healthcare providers. Make sure you discuss with your doctor any family history or medical conditions that may affect your pregnancy, as well as any supplements or medications you need to begin taking or that may put your pregnancy at risk. For example, you may want to find a doctor who provides pregnancy testing in Santa Rosa, as well as other conception and pregnancy services, such as checkups, scans and medical assistance.

3. Consider Talking To a Genetic Counselor

You may want to consider talking to a genetic counselor if you’re worried about genetic risks regarding your pregnancy or your baby. You’ll need to talk to the genetic counselor about your medical and family histories, focusing on birth defects, cancer diagnoses, genetic conditions and chromosomal disorders, as well as any family history of difficult pregnancies, miscarriages or issues conceiving. The genetic counselor can help you determine your level of risk and suggest useful genetic testing options.

4. Begin or Maintain Healthy Habits

You want to be as healthy as possible while pregnant to reduce risks to your pregnancy and your fetus. If you drink or smoke, stop doing that as soon as you decide you want to conceive. Research what foods are safe and not safe to eat during pregnancy. Check what types of exercises are most useful and safest for pregnant women to do. Find ways to manage your stress and anxiety.

5. Have Sex Regularly

Not only do you need to make sure you’re healthy and track your ovulation days, but you also need to have sex regularly in order to conceive. Generally, doctors suggest you have sex with your partner every day or every other day when you’re attempting to conceive, especially during the days on which you’re ovulating. If you don’t want to have sex that often, focus on the days on which you ovulate.

Conceiving isn’t something that will happen immediately. You need to be patient and keep trying. If you’re concerned about fertility issues, bring this up with your doctor so you can plan around it or look at alternative options.

5 Everyday Items That Could Cause Allergies

Data indicates that about 54.6% of the American population has at least one form of allergy. There are different types of allergens, but the more common ones are dust, mold spores, dander, and pollen. However, there are other everyday things that some people react to. In many cases, these individuals may not even know about the exact cause of their recurring allergies. The list below throws light on a few worth knowing.

  • Nickel-based buttons

If your clothing style is always anything denim or corduroy, you are most likely to have come into contact with nickel buttons. According to statistics, nickel buttons are common in blue jeans pants. Therefore, anyone allergic to this metal will likely have a circular, reddish-looking itchy rash in the area the skin was exposed to. If you have no idea about your nickel allergy, the appearance of the rash and the shape it takes can provide a fair idea of the cause.

On the other hand, if you already know about your allergy, it would be advisable to wear a layered fabric between your skin and the button. It is worth noting that apart from buttons, nickel can be found in wristwatches, sunglasses, and zippers. By taking these necessary precautions, you can avoid the discomfort of nickel allergy breakouts on your body.

  • Paraffin

Paraffin wax is derived from petroleum. It has several uses but is commonly found in scented and unscented candles. An exposure to paraffin-based candles can result in skin irritation, watery eyes, or respiratory difficulties. Therefore, to be on the safer side, you may want to consider a Bees wax candle as a healthier option.

  • Wool and lanolin

If you have sensitive skin, wool can make you itch, even when you don’t have an allergy to it. With that stated, there are groups of people with extreme sensitivity to lanolin. This is a waxy substance sheep produce in their wool. Even after processing the wool and creating blankets or apparel from it, lanolin is still present in this naturally-occurring material. It is why people with this specific allergy react severely to any wool-based material. Lanolin can also be found in some cosmetics. Therefore, when you know about your sensitivity to it, you will do yourself a great favor by staying away from them.

  • Chamomile products

According to scientific research, people with flower or pollen allergies are more likely to react to chamomile-based products. Whether it is tea or topical treatment, chamomile can trigger severe anaphylaxis. Depending on how the chamomile was used, reactions can include skin rash, swollen tongue, itchy throat, watery eyes, etc. These bodily responses are immune system reactions indicating that chamomile contains a compound an individual’s body does not contain. Like lanolin indicated in the previous point, you may want to stay away from chamomile products.

  • Latex

Gloves, balloons, shoe soles, toys, rubber bands are a few examples of things that contain latex. Latex is found in countless consumer products and can be quite difficult to deal with when you react to it. To date, it is difficult to understand why groups with this allergy are those with occupational exposure to latex. Perhaps, a reason which comes close is the assumption that continuous exposure causes the body to reach a limit. 

Allergies can arise from anything you are exposed to. Therefore, it is helpful to be in tune with your body at all times. That way, you can immediately pick up on any bodily changes from the ordinary.

6 Expert Hacks For Cleaning Your Living Room

926273

A living room is where people share good food, memories, and fun activities with family, pets, guests, and friends. Because of how much time people spend in it, it’s more prone to getting dirty or messy compared to the other areas of a home. Thus, if you want to be able to entertain people comfortably, you should ensure that your living room is cleaned consistently.

Fortunately, there are a number of tips and tricks available to help you get the job done easily and thoroughly. Here are the best cleaning hacks you can use for your living room.

Hack No. 1: Clean Sofas With Salt And Tape

Upholstered furniture, such as sofas and armchairs, are an investment you should take care of. Usually, cleaning a fabric couch requires more than just a vacuum, and it should be done thoroughly if you want to prevent it from wearing out quickly. If you want to extend its life span and keep it looking good as new, you may want to use these hacks:

  • Use tape to get rid of pet hairs: Pet hairs are one of the most challenging things to clean, even if you use your best vacuum. But there’s an easy way to get rid of them. First, cover your hands with tape, making sure that the adhesive side is facing outward. Once that’s done, tap your sofa gently with your hands. You’ll be surprised by how many hairs you’ll be able to remove that the vacuum may have missed.
  • Remove grease stains with salt: You’ll definitely love this trick if you’ve been stressing over stubborn stains. Start by covering the greased area with a paper towel to remove excess oils, then apply a generous amount of salt to absorb the stain. Let it sit for 30 minutes, then vacuum it.

Hack No. 2: Clean Curtains With A Cloth Duster And Homemade Solution

Not only do curtains add style to a house’s interior, but they also help keep pollution and dust from entering the home through open windows. That being said, you can expect curtains to be full of dirt particles brought in from outside. You don’t have to worry though. To get rid of it, all you need is a cloth duster, a vacuum, and a homemade cleaning solution.

  • Use a cloth duster to remove dust: This is usually used for upholstery, but it can also be used to remove dust from your curtains. If you do this, don’t forget to cover your face with a mask so you don’t inhale dust while cleaning, as this could possibly trigger allergic reactions.
  • Create a homemade cleaning solution: Instead of buying an expensive stain remover, you could mix water, white vinegar, and liquid soap to make a cleaning solution. Transfer the solution to a spray bottle and spray your curtains until damp. Afterward, turn a fan on to help the curtains dry, and voila, you’ve got clean curtains once more.

Owner of cute dog cleaning carpet at home

Hack No. 3: Clean A Remote Control With Wipes Or Cloth

Cleaning this small device seems like an easy task, but you should be careful with how you do it. As much as possible, avoid using soaking wet cloth for it, as this could result in water seeping in through the crevices. 

The safest way to clean a remote control is by using disinfectant wipes or a cotton cloth mildly damped with alcohol. Remove the remote’s batteries and gently rub the wipes or damp cloth over the surface. Then dry the remote control using lint-free cloth.

Hack No. 4: Clean A TV Screen With Microfiber Cloth, Water, And Vinegar

An easy way to clean your TV is by using a microfiber cloth dampened with white vinegar and water. First, mix together equal amounts of water and white vinegar. Then dip the microfiber cloth in it, making sure it’s dampened, not soaked. Afterward, wipe the screen gently with circular motions.

Hack No. 5: Clean Picture Frames With A Toothbrush And Microfiber Cloth

When you’re cleaning picture frames, make sure you’re in a well-lit area so you can clearly see all the details of each frame. Using a clean and soft microfiber cloth, wipe off the dust and dirt. Afterward, use a toothbrush to scrub the corners around the molding for more thorough cleaning. If there’s excess dirt brought out by the brushing, use the cloth to remove it.

Hack No. 6: Clean Carpets With A Squeegee And Baking Soda

You may think that cleaning carpets requires advanced equipment with the ability to wash, dry, and vacuum. However, you don’t need that to ensure thorough cleaning. Instead of buying a new cleaning tool, you may want to try using a squeegee and baking soda first.

  • Use a squeegee for pet hair removal: If pet hair is a constant in your home, swipe a squeegee along the surface of your carpet, and you’ll be surprised by how many hairs it can collect. Once you’ve used the squeegee on all areas, you can use your vacuum to finish up.
  • Use baking soda for oil stains: Grease stains are challenging to remove, but baking soda can be used to absorb these. All you need to do is apply a generous amount of baking soda to the affected area until it forms a crust. Afterward, you can vacuum it up.

Final Word

Using the hacks above will surely help make your cleaning time easy and efficient. And, since most of the materials mentioned are common household items, you can save money instead of using it to buy new equipment. Overall, you’ll be able to keep your living room clean without having to stress too much about effort or cost.